Princess Poppy Dress Tutorial

A friend asked if I could make “Poppy” dresses for her two girls for Halloween. I was like, “What’s Poppy?” Yeah, so I don’t usually keep up on the latest animated movies. No really, I didn’t see “Frozen” until it had been out on video for maybe a year. But since Poppy is most likely the “Elsa” of this Halloween, I figured I had better get with the times. So here it is:
I started with a basic A-line dress pattern. You could use any one you like or draft your own. I used the one designed by The Cottage Mama, included in her book, “Sew Classic Clothes for Girls.” As you can see, I traced out the size I wanted onto several taped-together sheets of paper.

Since this dress will not be the same on both sides, left and right, I wanted to make up a full pattern, one that would not be placed on the fold. So I cut out my first tracing, and traced that onto another set of taped-together pieces of paper.

I cut out the second one and taped them together down the middle to create one piece.
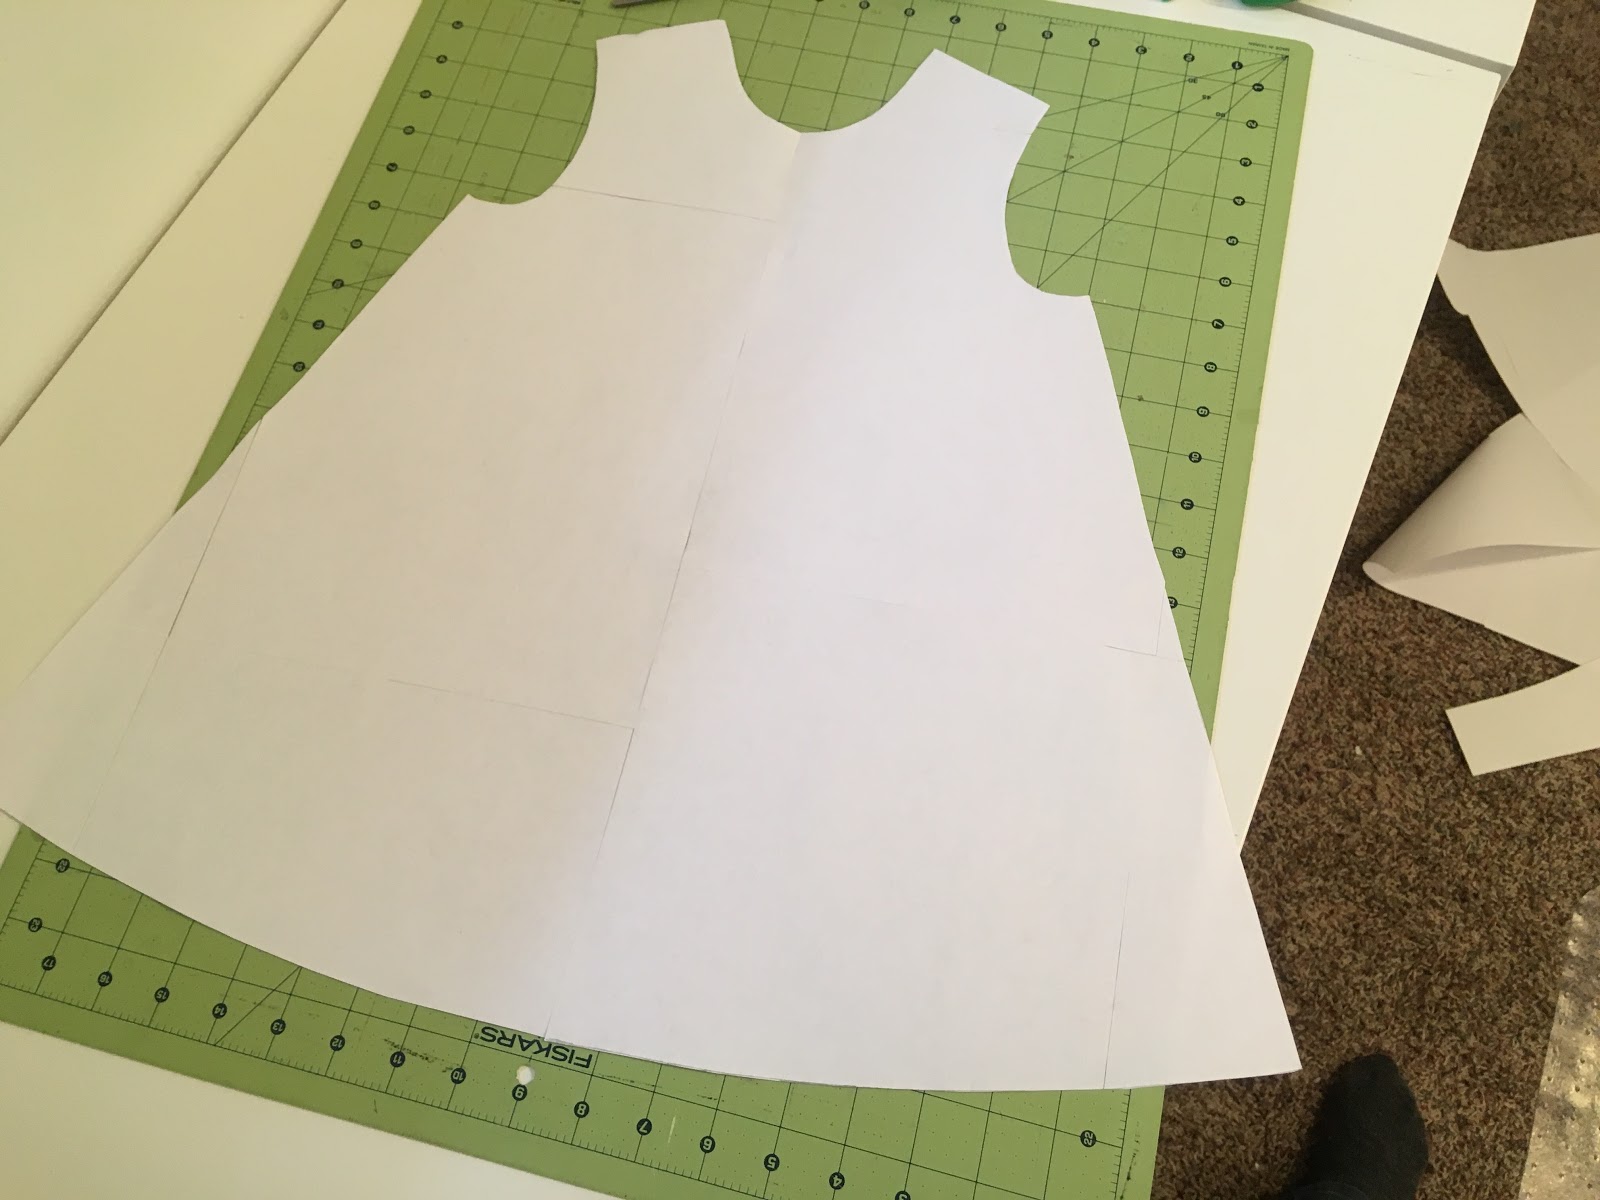
I penciled in the seam allowances, because the finished dress will follow those dimensions.

Focusing on the penciled-in seam allowances and imagining the finished dress, I drew in the ginormous “tab” on the front the way I wanted it to look in the end.

Since I would need to add this to the shoulder on the back side of the dress, I traced just the tab onto another sheet of paper.

I added seam allowances to the tab,

Then cut it out. Notice I did not add a seam allowance where it will connect with the shoulder.

I attached the “tab” to the shoulder, going up, so that when I cut out the back of the dress, it will just be one piece, with the tab extending over the shoulder to fasten in front. Notice, I overlapped the pieces slightly, placing the edge of the tab flush with what would be the shoulder seam allowance.

Next, I cut out the main dress pieces from the pattern I traced out. I laid my exterior fabric and lining on top of each other so that I could cut both at once. Make sure that your fabric is facing the right way when you cut or you could end up with the tab on the wrong shoulder or your fabric facing wrong-side out. For example, I wanted the tab to go over the left shoulder, so I made sure that the tab was on the left when my fabric was right-side facing up. I used fleece that had a right and wrong side, so it made a difference.


Once I had my back pieces cut, I removed the shoulder tab part of the pattern to cut out the front pieces.

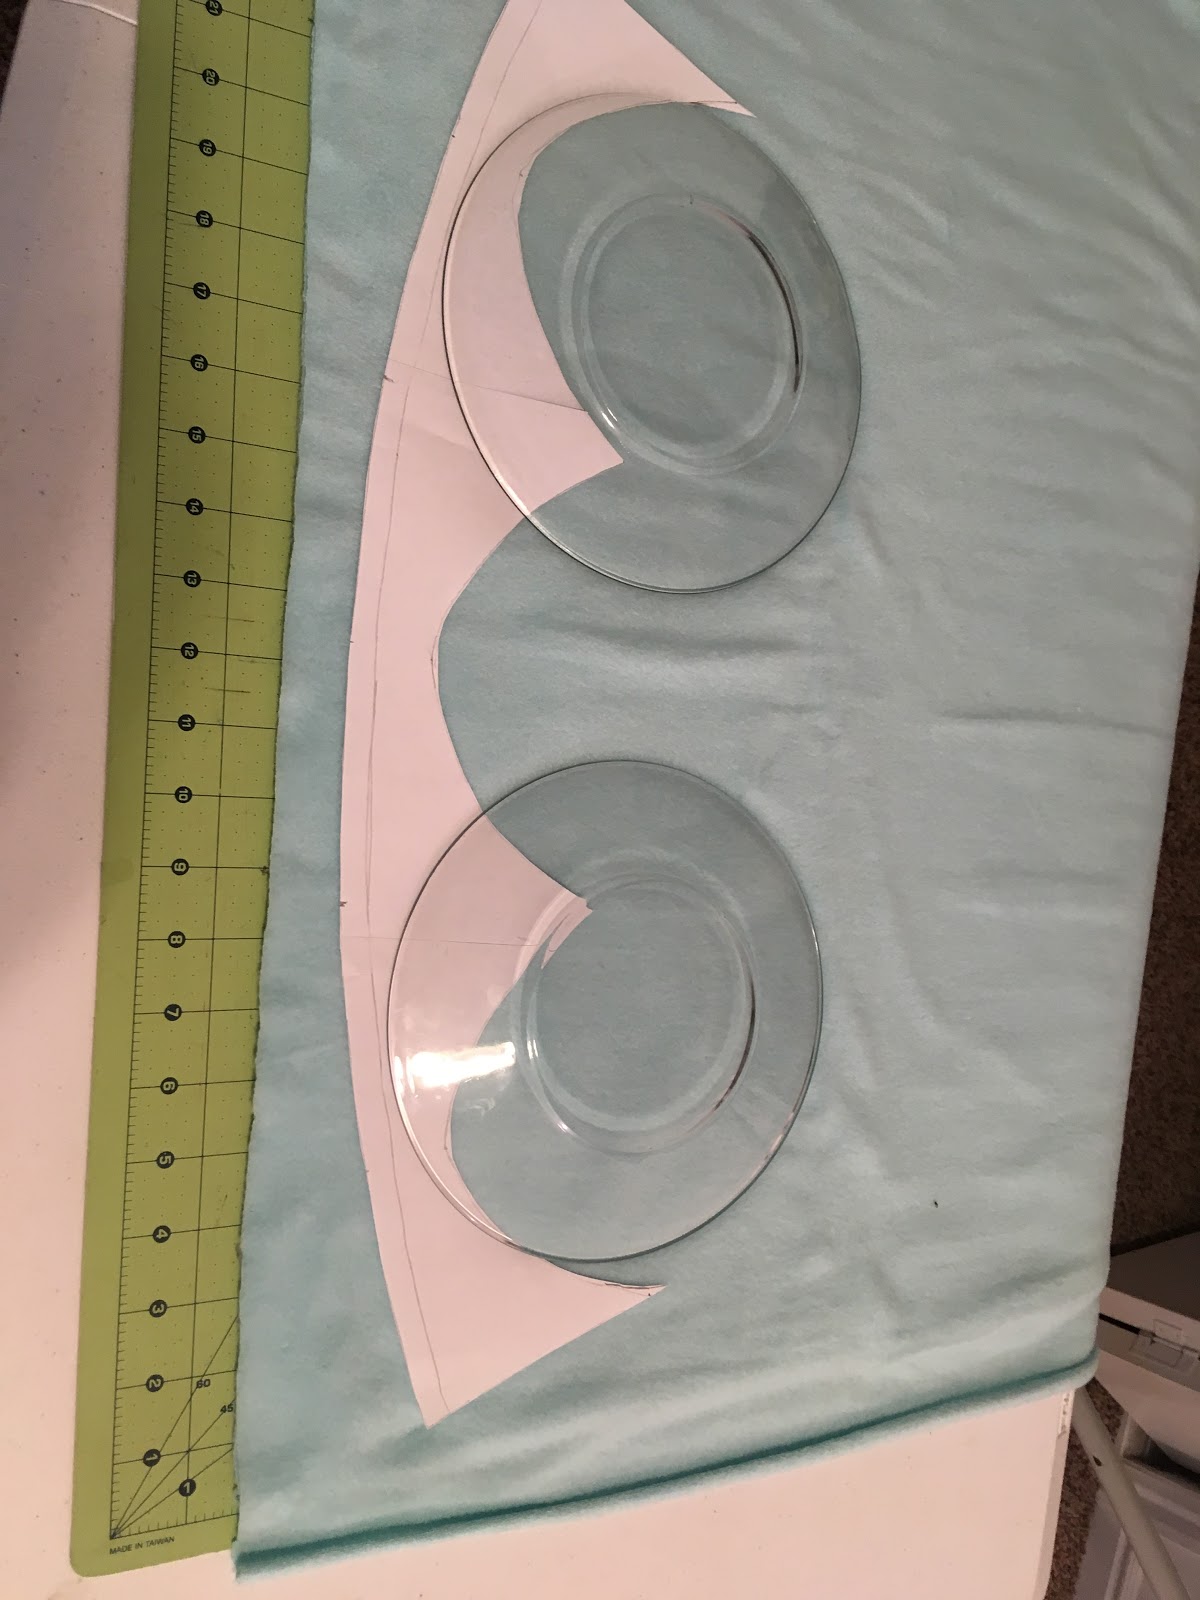
Now it was time to think about the decorations on the skirt. I used fleece for both the main dress fabric and for the decoration. You could use regular quilting-weight cotton, but it gets really cold here by Halloween, so I wanted the warmth. Any time I can make a costume from fleece, the chances are reduced that it will get covered with a heavy coat. I traced out the bottom of the skirt onto another paper.


Onto this skirt-bottom tracing, I drew the “waves” that I wanted along the bottom of the dress. Yes, I am a perfectionist, and actually measured the bottom of the skirt, divided it into 3 equal sections, then divided each of those in two, and measured up from each mark to make sure the waves were the same height/depth. I’m not good at free-handing this stuff, and I’m good at math. You use what you’re given, right?

I cut the “wave” template and placed it on a double layer of fleece to cut out both front and back
sections at once.

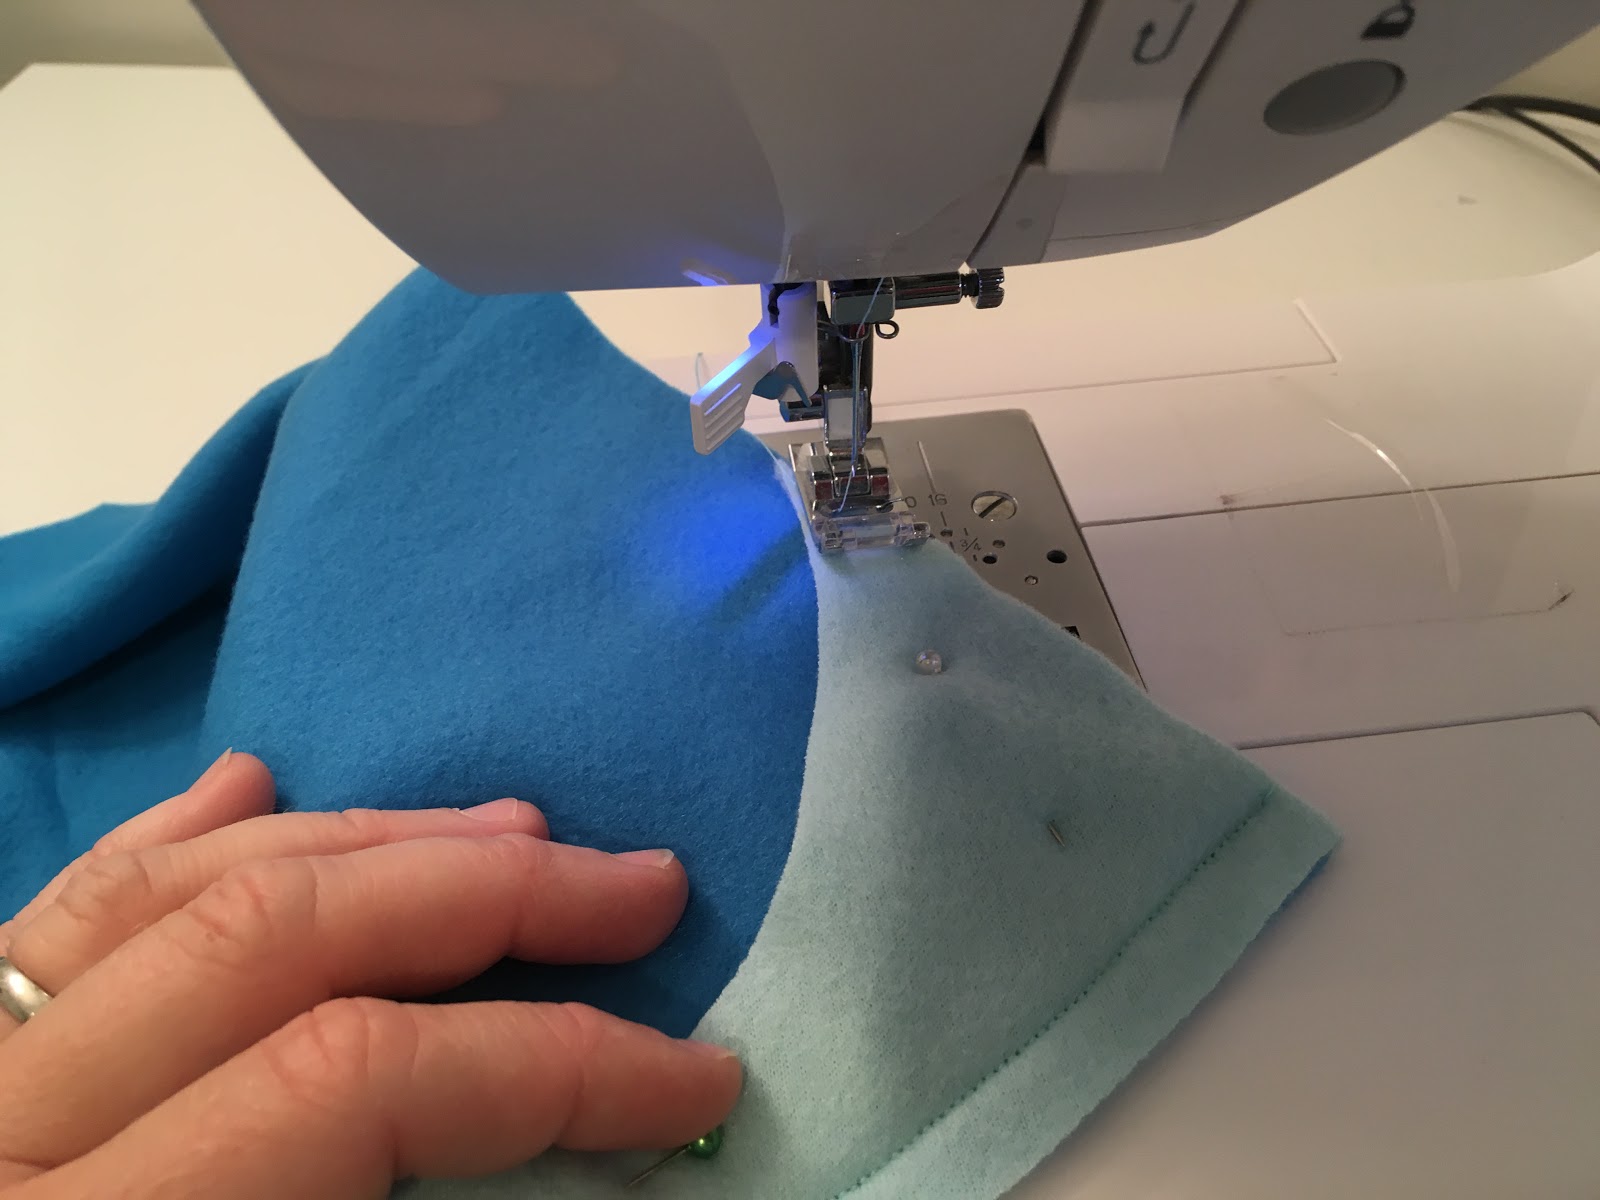
I pinned one section of “waves” to the bottom of each main dress piece (set the lining aside for now), and sewed along the bottom and top of the “waves.”


Now that I had the decoration attached, I was ready to begin constructing the dress. (I sewed on the tear-drop pieces at the end to help hold the main dress and lining together.) I started by sewing the shoulder seam on both the dress and lining. Make sure you have right sides together for your main dress fabric. You are only sewing one shoulder seam on each, since the other shoulder will have the tab closure. Press the seams open as best you can considering your fabric choices.

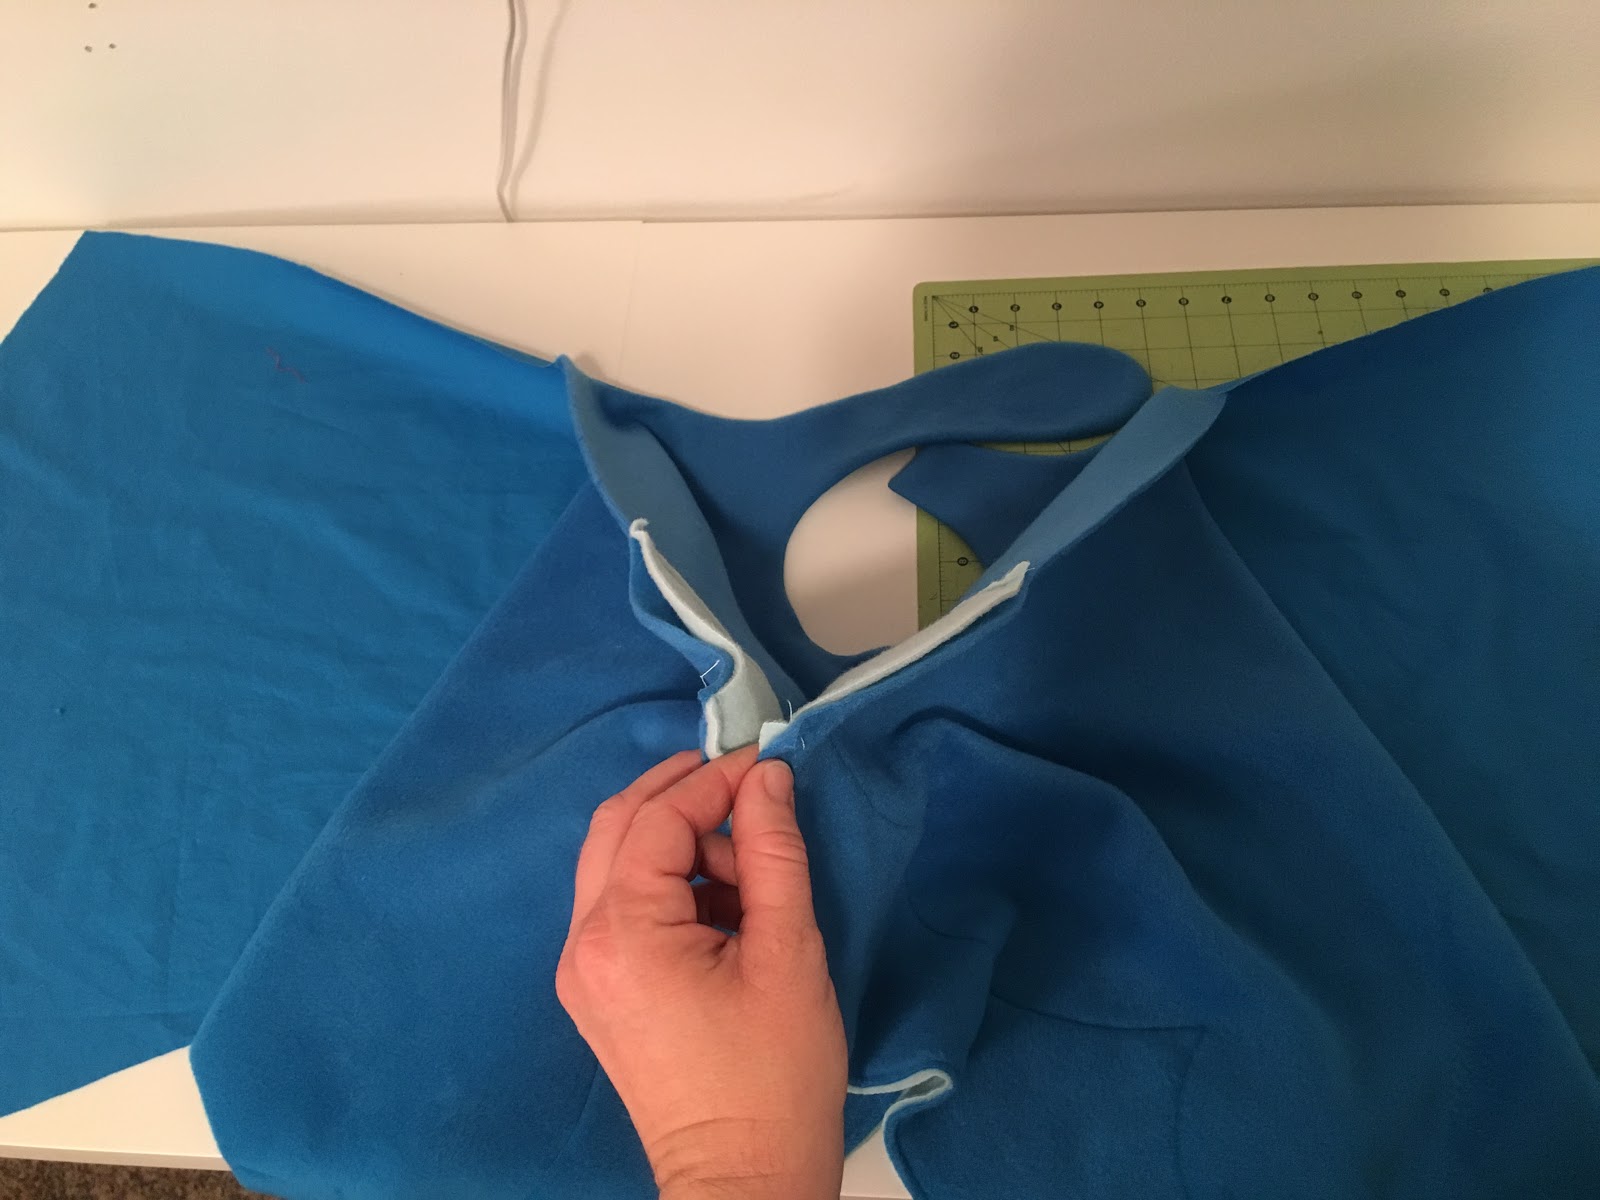
Next, I laid the main dress out, right side up and place the lining over it, wrong side up. So dress and lining are right sides together. I matched up the edges as closely as possible and pinned around the armholes and around the tab/free shoulder and neckline. I sewed 2 seams – one around the regular armhole from armpit to armpit, and the other on the “tab” side, starting at one armpit, continuing around the tab, neckline, free shoulder, and ending at the other armpit. I was careful to narrow my seam allowance along the shoulder that connects, since I knew I would be pulling the whole dress through that narrow space to turn the dress right side out.

Next, I reached in between the fabric and lining and pulled one side of the dress through the tube that was the connected shoulder. I had to be careful not to stretch the fleece out of shape. I worried that the shoulder was too narrow to pull all that fleece through, but with some pushing and pulling, it came out alright.

Once you pull it right side out it should look like this:

Next, I sewed the side seams, dress to dress and lining to lining. To do this, I picked up the dress exterior pieces and brought them together along the sides, right sides together. I pinned up to the armpits, then continued on, pinning the lining, also right sides together. I did this on both sides, and it looked like this:


I sewed both sides where I had pinned, trimmed and pressed seams open and then brought the dress exterior down over the lining. At this point, the dress was looking finished except for raw edges at the bottom.


The trickiest part to explain is how to finish the bottom. Not the trickiest part to do, just to explain. Starting at one of the side seams, I took the dress exterior in one hand and the lining in the other, then twisted my hands in opposite directions, bringing the side seams together again but this time right sides together. Then I worked along the bottom, pinning lining and exterior right sides together along the edge of the skirt. You can pin along the whole length of the hem this way, but be prepared for it to look like a mess while you’re doing it. It will work out. When you have the whole thing pinned, it will look like a funny-shaped cocoon that goes through and around the armhole. It’s weird, but trust the process.


I sewed all along the bottom that I had pinned, leaving a few inches open to turn the whole dress right side out. Try to leave your opening on the back of the dress, since it is a little tricky to close it up just right. But with the whole dress looking like a messy cocoon, it can be hard to tell which is back or front. Do your best.

Once that was done and seam trimmed, I simply reached inside the opening and started pulling stuff out. I just pulled until everything was right side out. I pressed the seam with the lining side up because it was cotton and could handle the heat better. I then top-stitched along the hem to hold everything in place and make the edge look nice.


When I got to the opening, I just turned the edges to the inside and pinned, then continued to topstitch over the opening.

Next, I cut lots of little teardrop shapes out of fleece, pinned, and topstitched them on, being careful to line up both the dress and lining underneath.


I also decided to topstitch around the arm/neck edges at the top of the dress.
I added a few pieces of Velcro to the shoulder tab and front of the dress as a functional closure, then stitched on a bit of rope to the front of the tab.


Ta da!


Comments
Post a Comment