Wrist pouch tutorial

I am always on the lookout for quick, easy, and cheap projects I can make for my kids at school to purchase at our monthly "store" with the points they have earned. Dollar store items are wonderful, but I also like to have a few handmade things as well. Things I can make for 50 cents or less, and in 15 minutes or less are gold. These wrist pouches fit both criteria!

These pouches snap around the wrist and have a zipper pocket that is open the entire length, from snaps to snaps. It's basically a wearable wallet.

I started with 2 pattern pieces - one for the front (4 x 10.5 inches), and one for the back (4 x 9.5 inches). The front is longer because we will end up cutting it into several pieces and sewing it back together around the zipper, so the extra length is for 1/4 inch seam allowances.
I marked lines on the front pattern piece where I intend to cut: a vertical line 2 3/4 inches in from each side, and a horizontal line across the middle section. Fold the pattern piece along the vertical lines but do not cut. I will simply use these folds as a guide when I am cutting.
(I designed this size to fit elementary school children, so, while I can get it to snap around my wrist, it's pretty snug. If you are making this for an adult or teenager, you might want to make it just a little longer. You can also change the placement of any of the lines. If you want the zipper opening to be longer, cut off less than 2 3/4 inches from the sides. if you want the zipper higher or lower, move that line up or down.)

Cut a front and a back from your main and lining fabric. Here are my pieces. You will also need a zipper that is 6+ inches long. Mine is 10 inches, which works fine. I will cut off the excess. (I bought a pack of 100 zippers on amazon for about $14. That is what makes this project so cheap.) I will also use matching plastic kam snaps for the closure. You could use velcro instead, but I am in love with kam snaps right now :)

Now that I have front and back cut out, I'm going to cut up my front piece along the lines I drew on my pattern piece. Place main and lining wrong sides together and cut them as one.

I line up my pattern piece on top of my fabric and fold the side back along the line.

Then I cut along the fold.

Repeat for the other side.

I'm not even using a guide to cut the horizontal line across the middle piece. This will be where the zipper goes. Any horizontal line will do so long as it's at least an inch from the top or bottom.

Once I've cut up my front pieces, this is how it looks.

I lay it out in front of my sewing machine just how it will look in the end. (The amount of height eaten up by seam allowances and added by the zipper in the center section will cancel each other out, so the center section will match up with the sides in the end, trust me.)

I prefer the zipper opening on the left. I move the side pieces out of the way slightly so I can sew in the zipper.

I flip the top piece of main fabric down, right sides together along the top edge of the zipper. I work in the middle of the zipper, which makes the process easier since I don't have to work around the zipper pull.

I sandwich the zipper between the top piece main and lining, with the right sides of both fabrics facing in toward the zipper. Pin in place.

Using a zipper foot, sew 1/4 inch away from the edge.

Flip the fabric pieces up away from the zipper and out of the way.

Now repeat the process with the lower pieces of the center front, by flipping the main fabric up, wrong sides together, on the zipper.

The lining piece gets flipped up and the zipper is once again sandwiched between fabrics. Pin and sew the same as before.

Flip the fabrics out again.

Now you should have a piece that looks like this.

Pulling fabrics away from the zipper as much as possible, iron it flat.

VERY IMPORTANT! OPEN THE ZIPPER! Make sure your sipper pull is open, but still within the fabric rectangle you have created. Do not open it past the end of the fabric.

Now it is time to attach the sides. flip the main fabric so it is right sides together with the middle portion you have already sewn.

Flip the lining around the back so that the middle portion is sandwiched between the 2 left side pieces, main and lining both with their right sides facing in. Line up the corner as best you can.

Pin from the corner to the zipper, lining up the edges.

Carefully bring the zipper ends together, line it up and continue to pin. This side is the tricky one since you do not want any separation between the 2 sides of the zipper tape.

Sew slowly, using a 1/4 inch seam allowance. Go carefully over the zipper tape, leaving the pins in place as long as possible.

Flip the side fabric pieces right sides out.

The zipper ends may extend past the fabric, but that's ok. We'll trim them in a minute.

Repeat with the other side pieces. This side is not as trick because the zipper is zipped together.

When you are done sewing both side pieces, trim the zipper ends flush with the seam allowance. Do this on both sides.

Press flat.

Optionally, you can topstitch along the side seams. You have now finished the front piece and all the tricky parts.

Now, with your completed front piece right side up on the table, place your back pieces, main right side down, and lining right side up, on top of your front piece. Depending on your precision with seam allowances this far, the pieces may or may not match up perfectly. That's ok. Just match it up as evenly as possible.

Pin it all the way around.

Sew all the way around the edge using a 1/4 inch seam allowance.

Your project should look like this.

trim all the way around with pinking shears. If you don't have pinking shears, trim the seam allowances even and zig-zag stitch around the edge.

Turn the pouch right side out by pulling everything through the zipper opening. Remember I said it was important to leave the zipper open? This is why.

Use a chopstick or something like that to push out the corners. Press The whole thing flat.
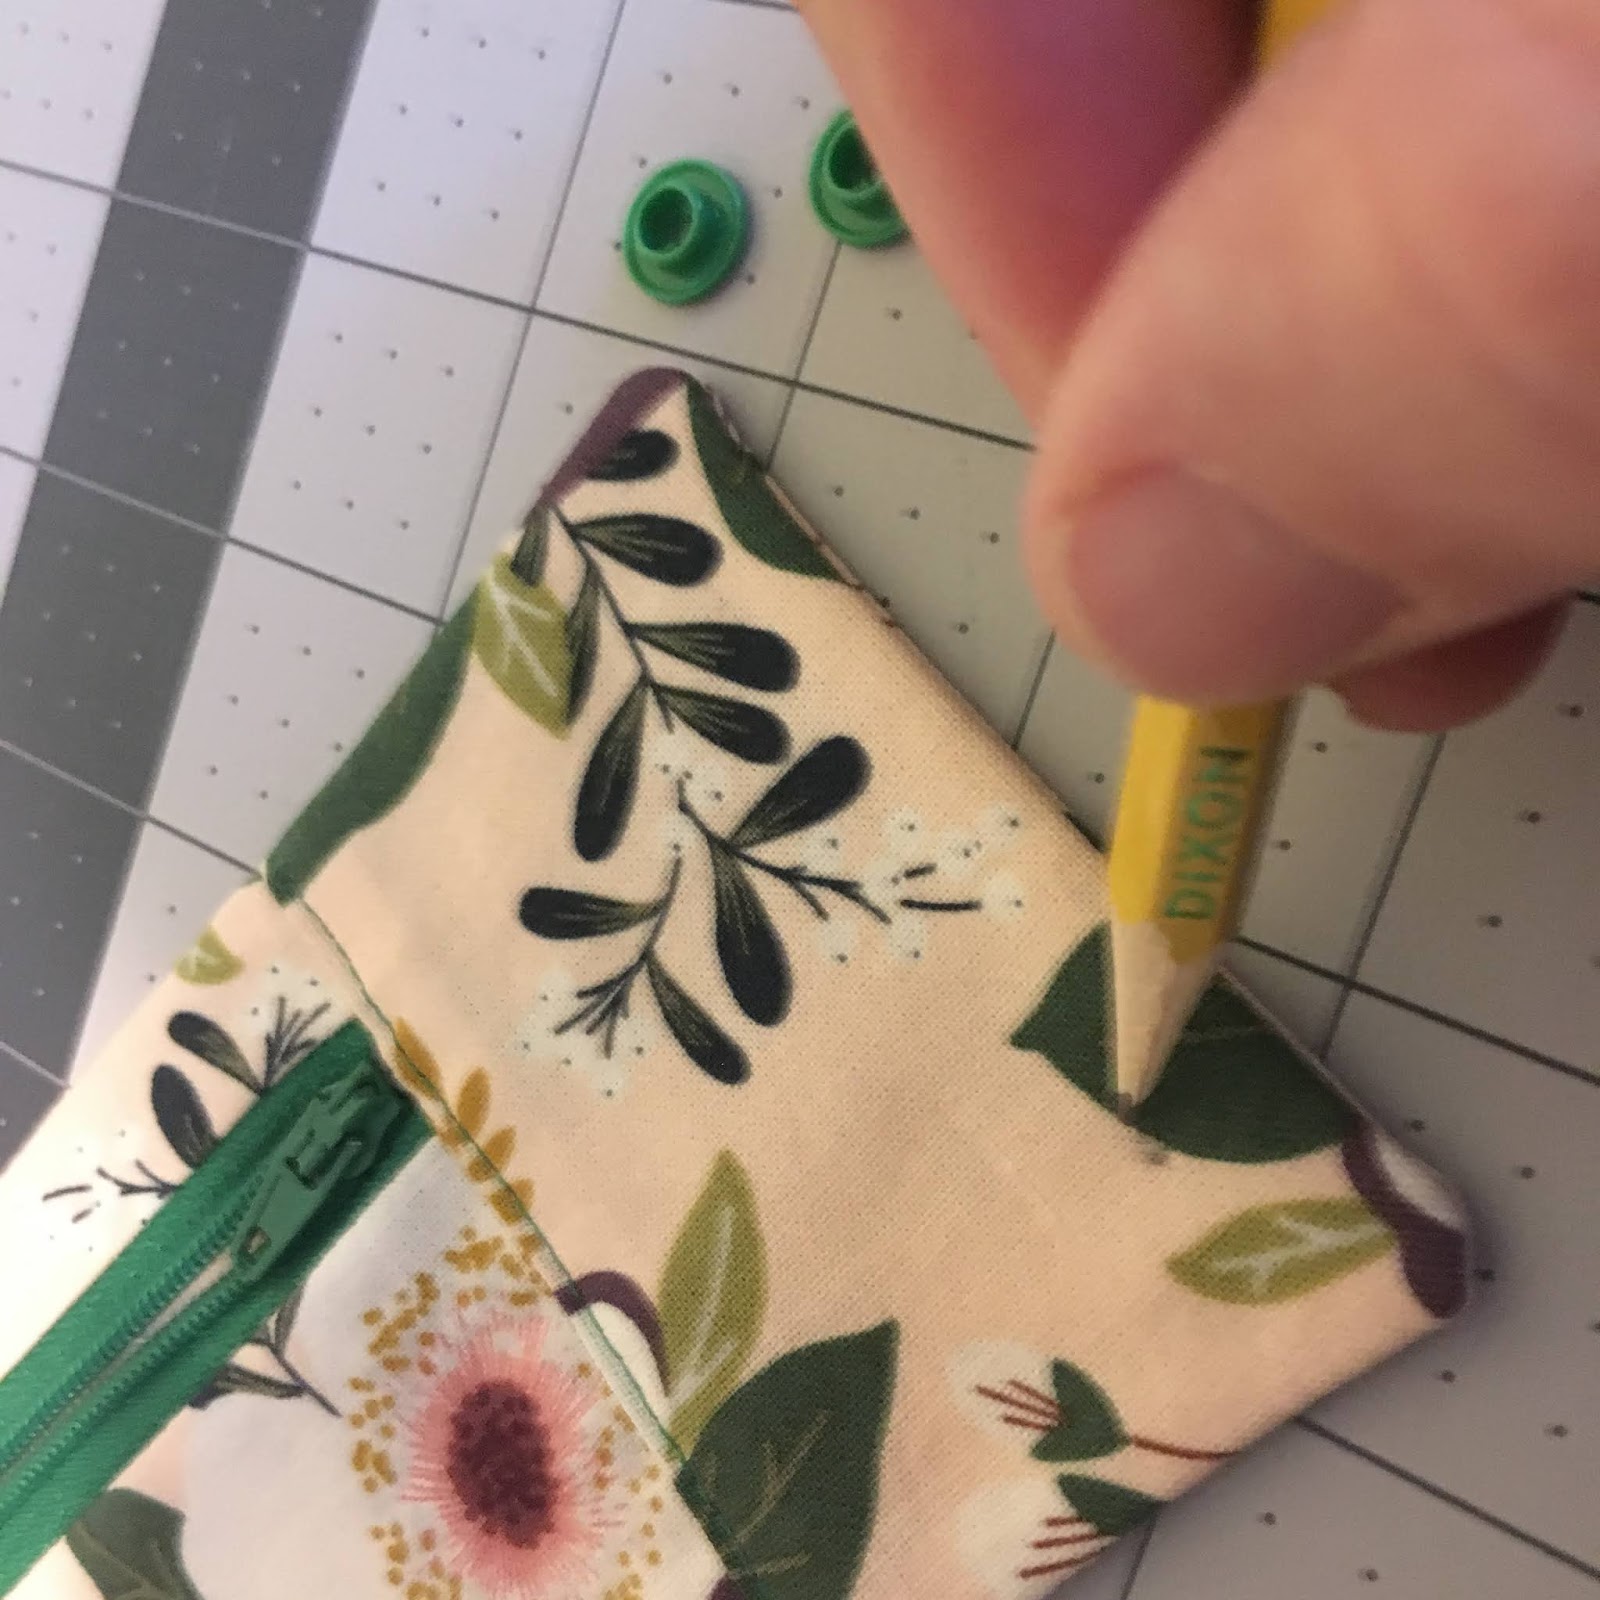
Mark where you want the snaps.

Install by poking a hole in the fabric...

pushing the prong through...

and placing the other side of the snap.

Use the snaps already place as a guide for the snaps on the other end.

Install the final snaps.

And you're done!

Thank you so much for this well laid out tutorial.......I have been searching high and low for a proper tutorial on this wallet.
ReplyDelete